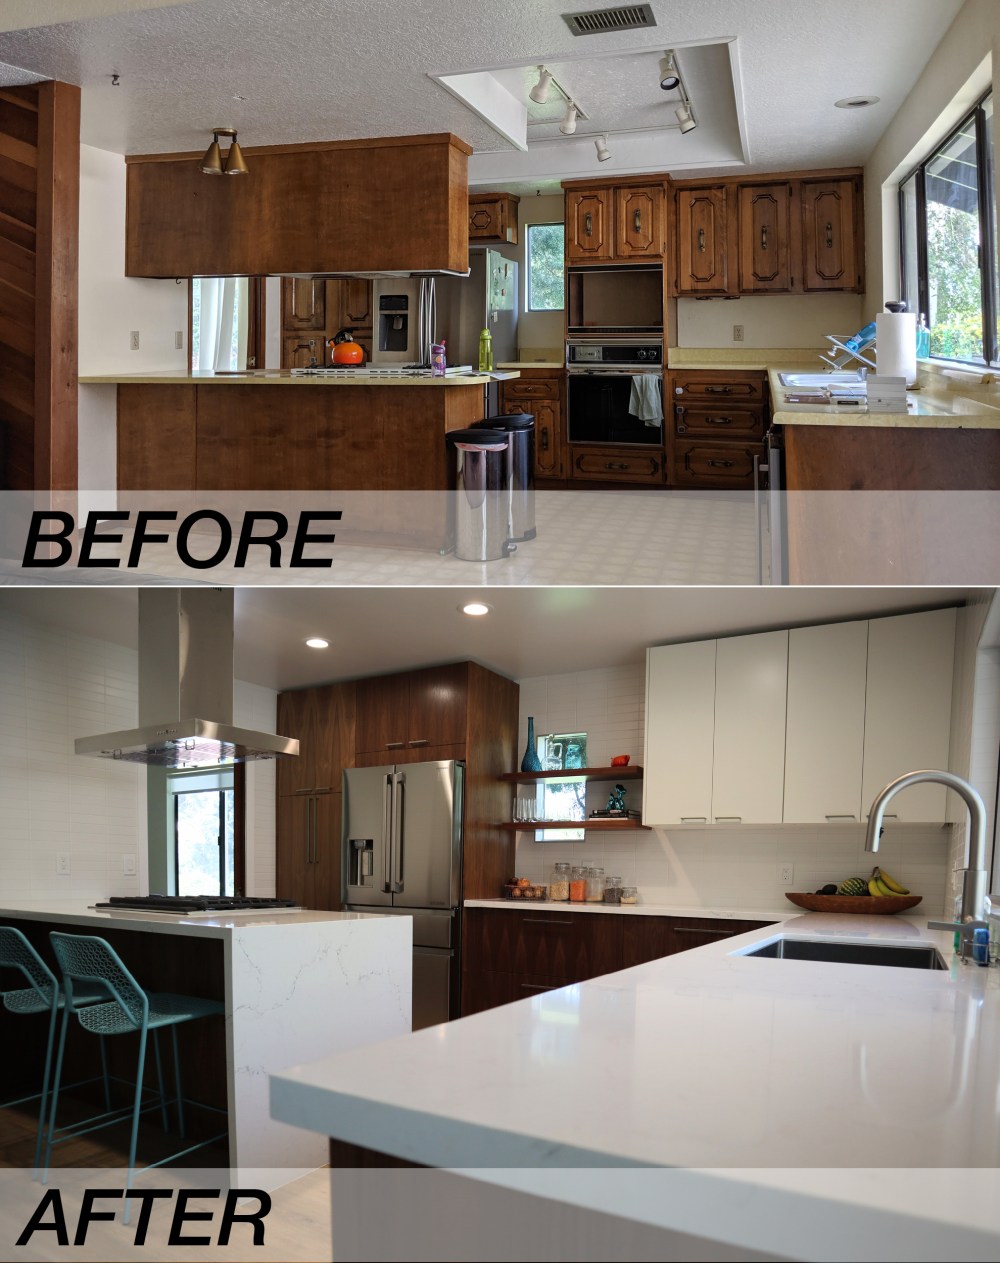
After three long months of construction and many nights of cooking dinners outside on my camping stove, it’s finally done. My new kitchen is DONE! And I love everything about it—the layout, design, materials, appliances—they are all huge improvements to my original 1970s golden yellow kitchen. I feel like I can cook anything and truly share the joy of cooking with my family and friends.


After the old kitchen was demolished and removed, the new kitchen started to take shape. Cabinets above the stove were removed permanently, and an island venting hood was installed above the new 30″ range oven combination. The original drop ceiling was removed and replaced to gain an additional six inches of overall kitchen height, and LED can lights were installed. A tight path of travel between the refrigerator and stove plagued the original kitchen design, making it nearly impossible to walk through while someone was cooking at the stove or opening the refrigerator. The island was pushed 12 inches toward the family room to widen this path, creating an inviting kitchen that welcomes visitors and helping hands.
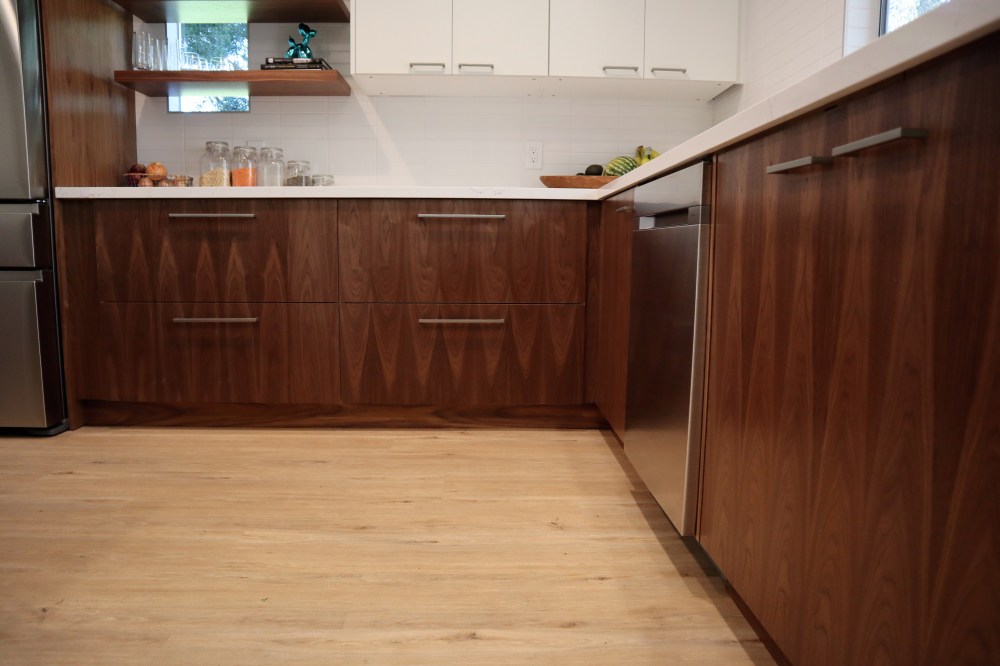
The kitchen design is mid-century inspired, but with modern 2020 conveniences in mind. Quartz countertops rest atop Ikea cabinets, and Kokeena plain sawn walnut cabinet and drawer fronts create a continuous flow of wood grain. A 3×8″ matte white subway tile disappears in the background, but up close beams with pattern and precision to brighten up the space. The sharp, clean lines throughout the kitchen invite organic materials in—fruits, vegetables, seeds, and grains adorn the countertop and emphasize the vitality of these healthy foods. Two floating shelves traverse the picture window, offering self-serve crystal drinking glasses, easy access to cookbooks, and a place to display art. Large drawers optimize storage space, and Ikea’s jellybean pull-out shelves solve the problem of the awkward corner cabinet. Messy hands? Bump the trash pull-out drawer with your hip and it triggers a small motor that pushes the trash drawer out. Or place your hands under the faucet and it automatically turns on. Natural light streams in through brand new aluminum windows, and a deep stainless steel sink makes dishwashing a little less tedious. The light-toned luxury vinyl plank flooring is waterproof and contrasts with the warm walnut cabinets to create a durable and welcoming cooking environment.

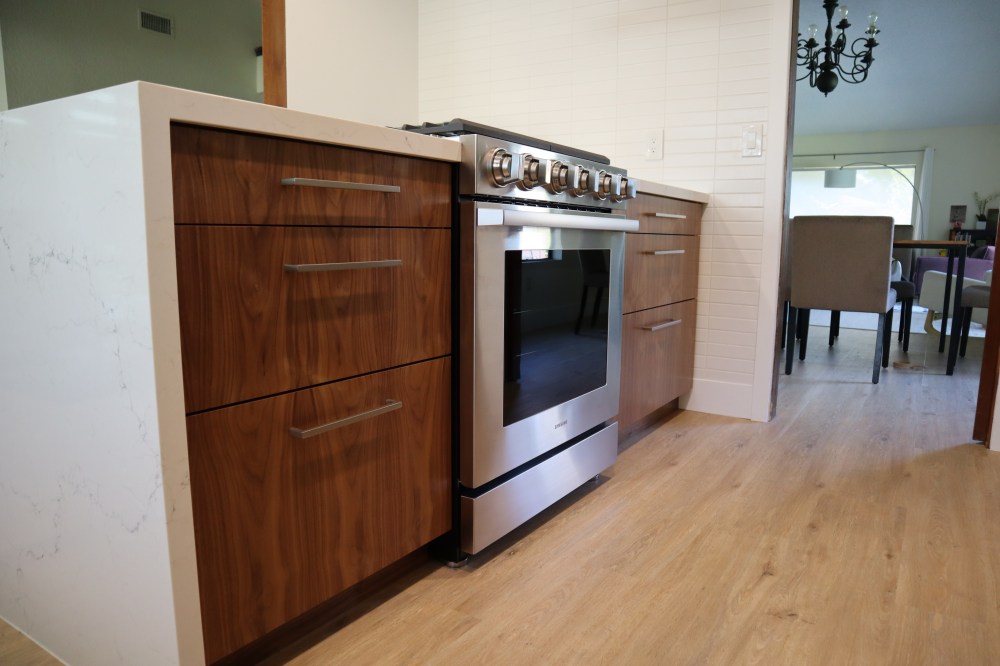
My new kitchen is outfitted with Samsung Chef Collection appliances. The refrigerator is sleek, tall, and spacious enough for my weekly grocery shopping haul. Extremely quiet yet full of cute Samsung beeping songs to signal when washing is complete, the dishwasher cleans quietly and doesn’t wake us up at night. The Samsung Chef Collection 30 inch range oven combination is the star in my kitchen—I can now bake cookies without burning them! My old oven was 30 years old and very inaccurate. For every recipe I would have to adjust the cooking time or temperature to cook and bake properly. And baking bread wasn’t even an option in that old oven! My new oven can cook anything perfectly and the four-burner range is a dream.
The Planning, Design, and Construction Process
We decided to use Ikea’s kitchen design services to help us figure out the layout of our new kitchen. Ikea sent someone out to take measurements of our kitchen, then they designed and built a model of the new design using the Ikea Kitchen Planner. It did cost us $199 for the Ikea Planner to design our kitchen, but it was totally worth it because we had the opportunity to discuss the layout and make changes on the fly. Once we were happy with the design, I ordered all the parts and pieces from the Ikea parts list. (Everything except the drawer and cabinet fronts.) Ikea recommends going into the store and ordering all the kitchen parts with an Ikea representative, but I decided to order everything online. I simply built my shopping cart using all the part numbers, double-checked it, then placed my order. There were a few hinges that weren’t available when I placed my order, but by the time my kitchen was almost completed, the backordered hinges were available again.
Next, I connected with Kokeena to order the drawer and cabinet fronts. We wanted plain sawn walnut veneer fronts, and since Ikea didn’t offer a comparable finish, we decided to purchase them from Kokeena. Kokeena makes drawer and cabinet fronts specifically designed for Ikea cabinets, so I simply sent them my Ikea parts list and they worked up a quote for my kitchen.
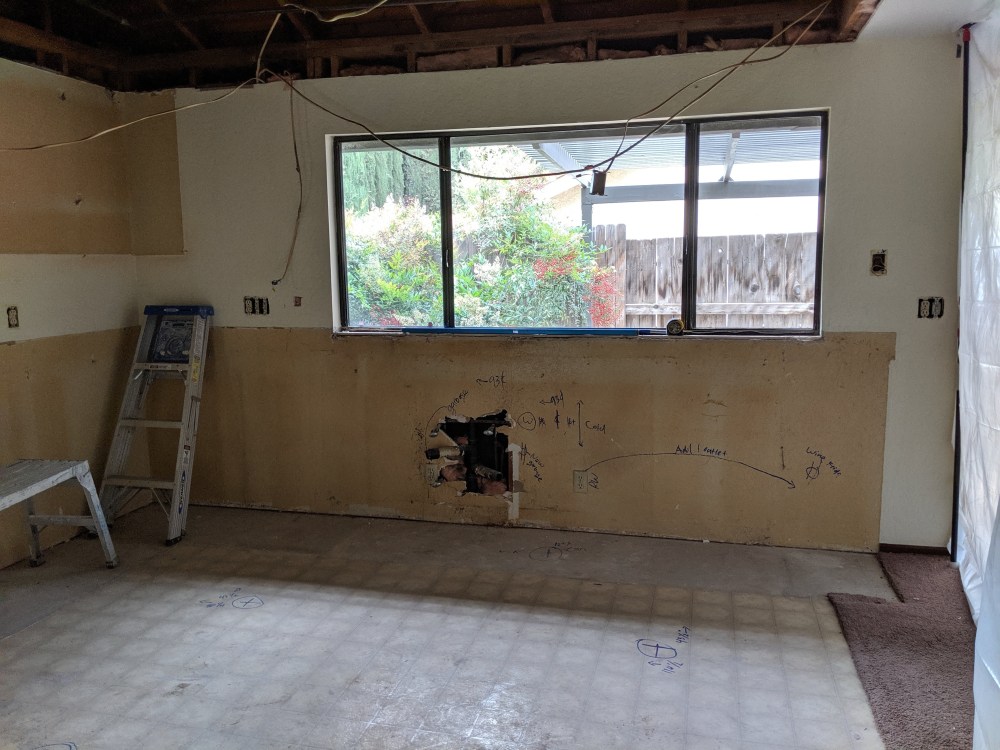
Once all the Ikea parts and Kokeena pieces had arrived, it was time for my contractor to get started. His team did all the crazy hard work of getting the space ready for the Ikea assembly team. They demolished the old kitchen, removed the ceiling and raised it six inches, moved plumbing, gas, and electrical as needed, and smoothed out all the walls. Next, the Ikea assembly team spent two solid days building and installing all the cabinets. Once they were finished, the contractor installed the quartz countertops, tile, sink and faucet, flooring, and painted the walls. And for the final step—the appliances were delivered and installed!


New kitchen, new appliances, and an entirely new vibe—I’m elated with my new kitchen and I hope all this info helps you realize your own cooking journey, whether you’re planning your own kitchen remodel or looking for inspiration.